Thursday, October 7, 2010


It's All About The ATCs!
It's been ATC madness in my craft room recently. I just finished three more sets of ATCs for Jean's By The Number ATC swap on the Cricut Message Board. What made this challenge so much fun was that we picked numbers for the groups we were in, and our esteemed Hostess then gave us our assignments. I wasn't too sure of what I was going to do when I saw my themes. There was an option to request a different theme, but there was no way I was walking away from my themes! LOL! I am happy with my results and I hope my fellow swappers enjoy them, too!
Sadly, group 1 was full by the time I signed up, so I am in groups 2, 3 and 4. This is group 2. The theme is Standing Still. My first thought was to go with a picture of a lake, but then I stumbled across the picture I used. It is called Time Standing Still. Everything about this picture appealed to me. The quote is one of my favorites, "grow old along with me, the best is yet to be" I don't know where the quote originated, but for me, it's always going to be John Lennon's voice I hear when I see this quote. I associate the quote with my husband and family. We are blessed, and I am truly thankful to have my soul mate to grow old with. This ATC turned out to be very personal for me. I love the concrete clock in the fountain with Father Time, and the soft, muted colors on this picture. I cut small Peacocks from French Manor and corners from Picturesque on my Cricut in SEI blue velvet paper. I added a little bling to the Peacock with Platinum Stickles, and here is how they turned out.


Sadly, group 1 was full by the time I signed up, so I am in groups 2, 3 and 4. This is group 2. The theme is Standing Still. My first thought was to go with a picture of a lake, but then I stumbled across the picture I used. It is called Time Standing Still. Everything about this picture appealed to me. The quote is one of my favorites, "grow old along with me, the best is yet to be" I don't know where the quote originated, but for me, it's always going to be John Lennon's voice I hear when I see this quote. I associate the quote with my husband and family. We are blessed, and I am truly thankful to have my soul mate to grow old with. This ATC turned out to be very personal for me. I love the concrete clock in the fountain with Father Time, and the soft, muted colors on this picture. I cut small Peacocks from French Manor and corners from Picturesque on my Cricut in SEI blue velvet paper. I added a little bling to the Peacock with Platinum Stickles, and here is how they turned out.
Group 2-Standing Still

Group 3 had the theme Deep In Thought. Once again, what I started out with, is not the ATC that I finished with, LOL! I call my ATC, "I Wonder..." Don't you think the little girl in the picture is lost in her thoughts? I used a scalloped nestability to crop the photo. A bow and a tiny heart complete the ATC. I went light on the embellishments on all my ATCs this round, I don't know why, I just did...
Group 3- Deep In Thought

We were offered a challenge within the challenge which we could do or just skip. The challenge was to make an ATC that would be personal for us. I know I said that my Time Standing Still card is personal to me, and it is, but I found the perfect personal Advertisement for my group 4. McCauley's Equine Formulas. The feed company with one focus, the horse. Yep, that's their motto! I love horses! I am a McCauley, through and through, so there you have it! It's all personal to me! LOL!
Group 4-Advertisement

Once again I went clean and simple. I printed out the feed company's logo, added some layers, a black velvet horse cut from my Cricut, (I think I used A County Life Cartridge for the cut) and finally, added some Viva Decor. I really like this one.
Thanks for stopping by the blog today!
Happy Crafting!
Colleen
Friday, September 24, 2010
Home Sweet Home ATC swap

Here are my group one Home Sweet Home ATCs. It's a adorable stamp from Impression Obsession. The stamp is larger than the ATC image, so I trimmed it to fit. I ordered this from Addicted To Stamping way back in March after being on a waiting list for ages for it. I just had to use it, and hey, it's fits the theme and the season! I plan on showing the full image on a card here for Halloween, check back if you want to see it. The image is colored with Copics, naturally. I'm not sure if the eyes in the bird's outhouse can be seen the pics, but it's really cute, and you just have to love the cat! I've only colored wood one other time with my Copics, so the houses are all a little different. I can't decide which way I like the wood best.
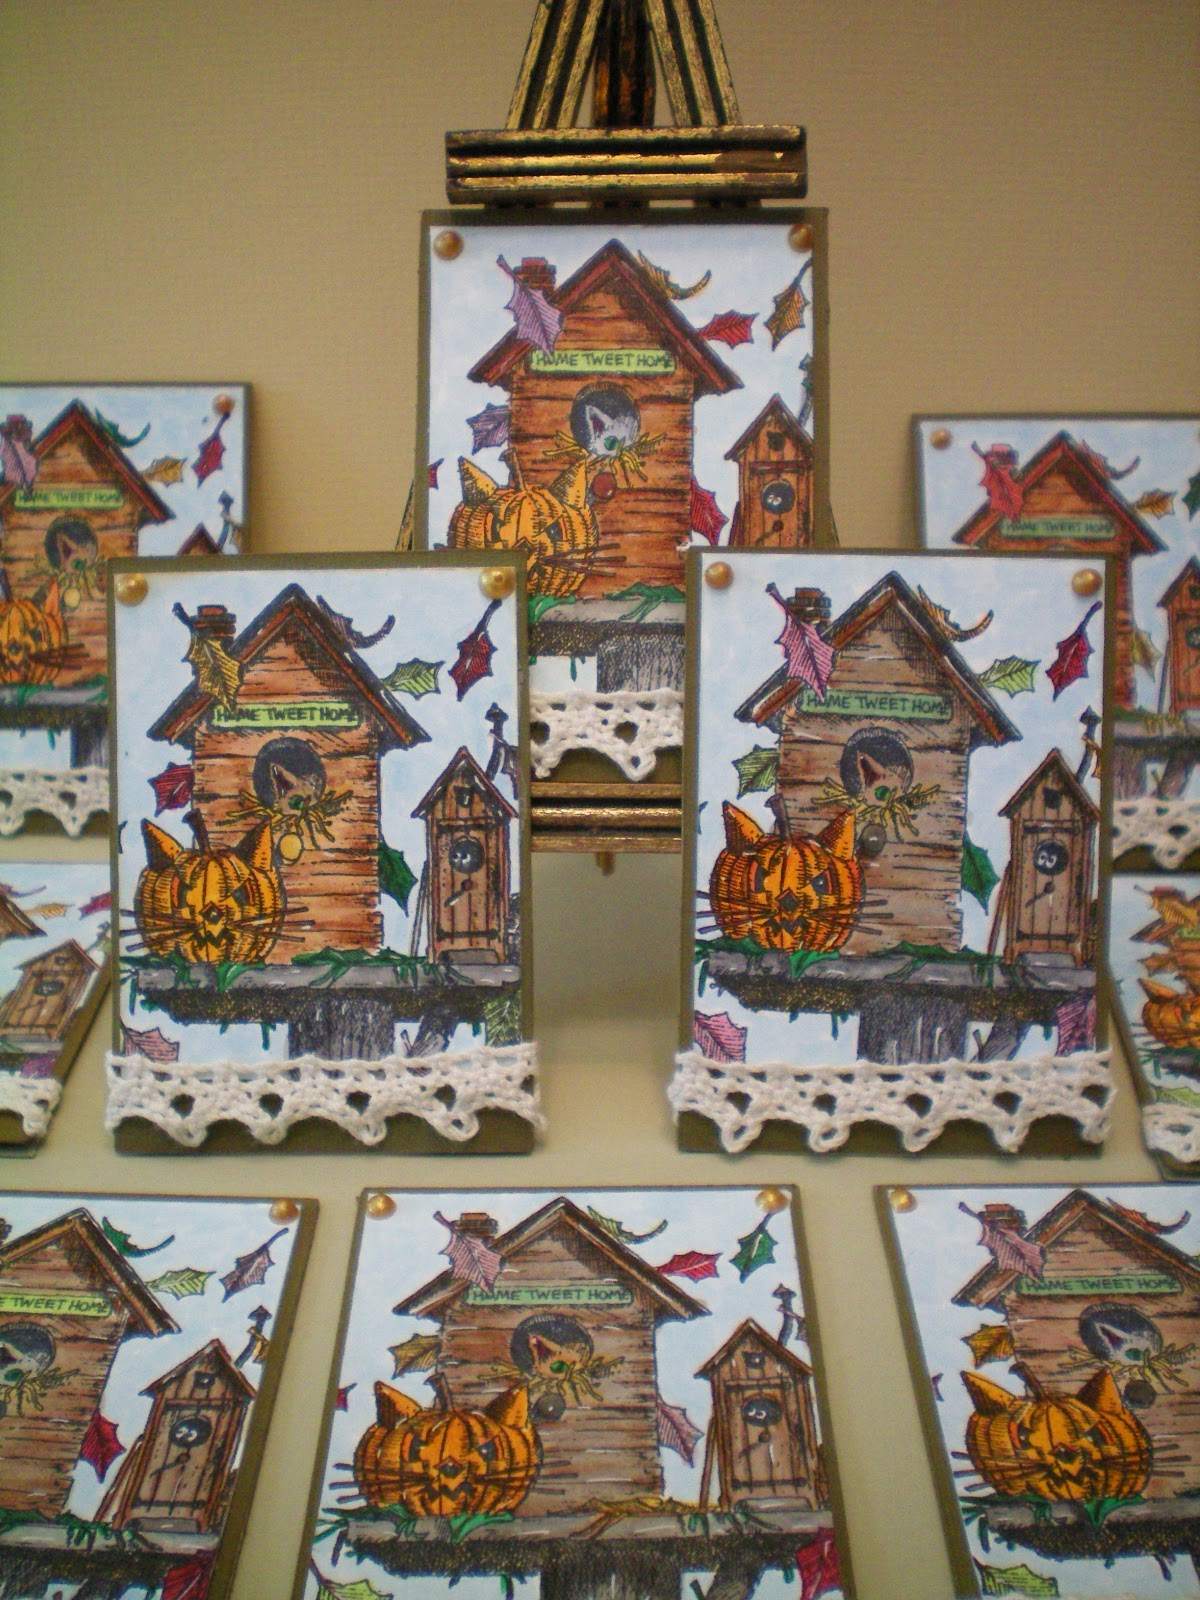
Group 2


For Group 2, I wanted a family theme. These are called "Home, The Key to My Heart". Truer words cannot be spoken for me, because my family are truly my heart's home. This is an all Cricut ATC. The key, heart and key hole are all from French Manor. I went looking for paper with the word Home printed on it, and when I couldn't find any I liked, I decided to take plain pink cardstock and print the word home on it. I went a little crazy with Distress inks, and then spayed the hearts with Shimmer Spritz in Baby's Breath.
I will take the photos of Group 3 tomorrow before they head to the Post Office!
Thanks for stopping by!
Happy Crafting!
Colleen
Happy Crafting!
Colleen
Saturday, September 11, 2010
Through My Lens, Why I Will Never Forget...
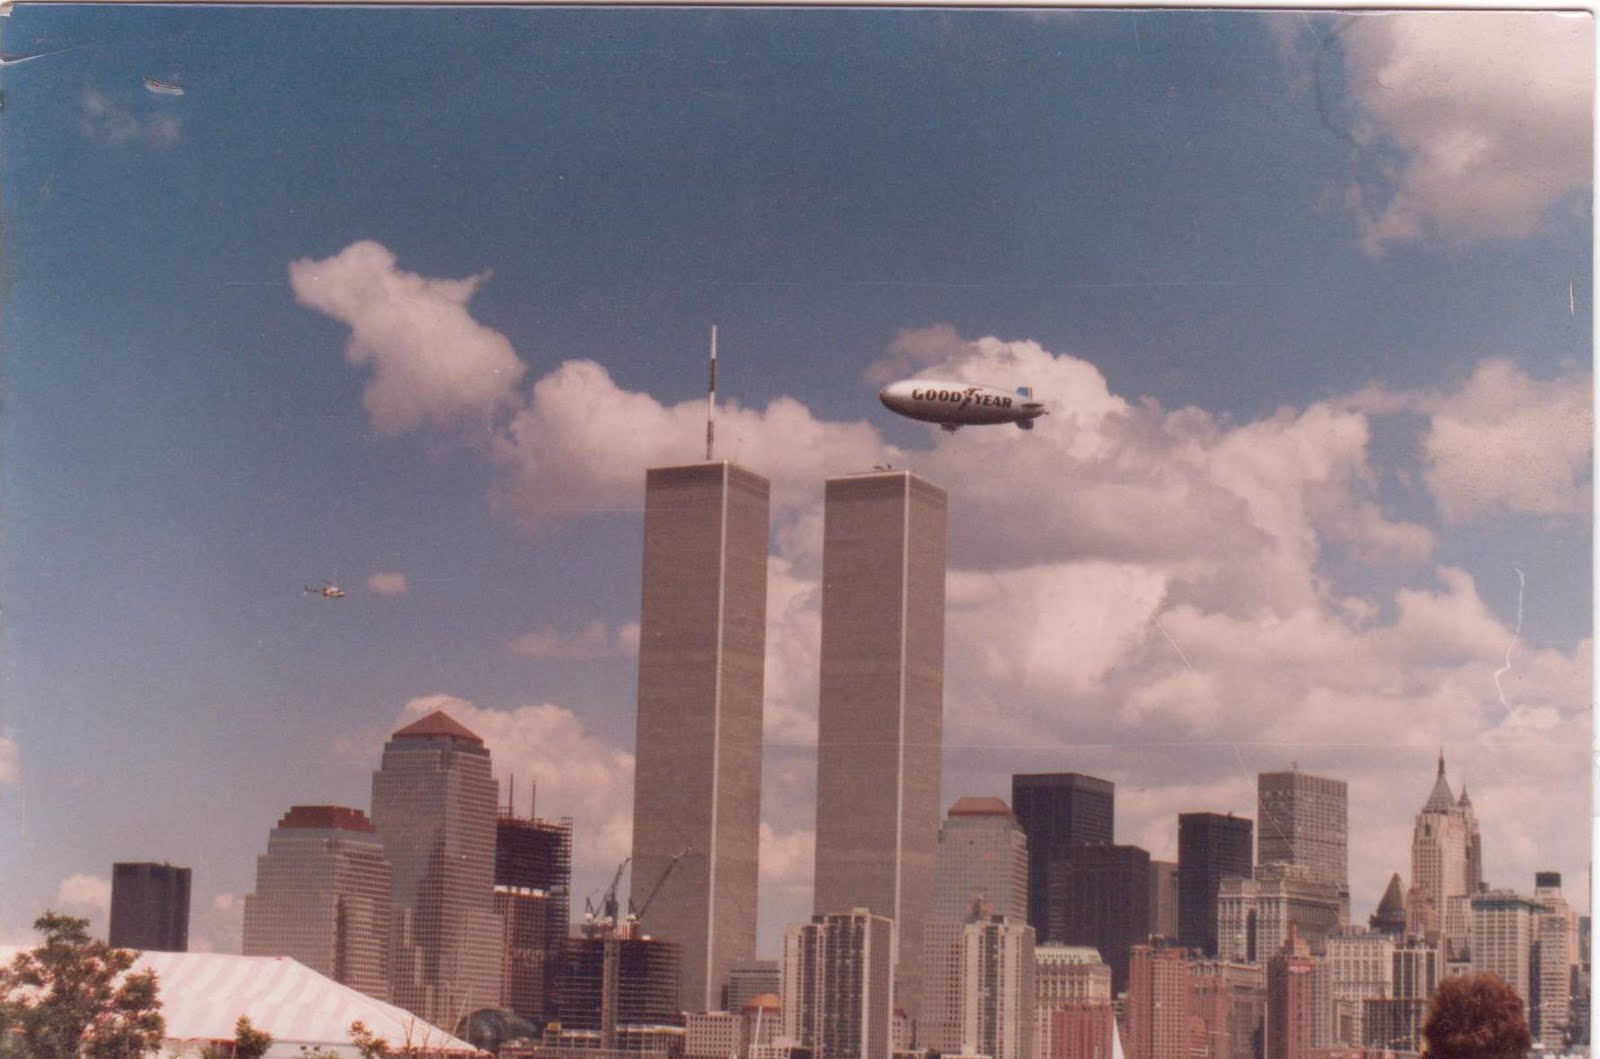

Life before and after September 11, 2001.
Lower Manhattan was still covered in the ash, buildings, the sidewalks, streetlights, it was everywhere. Our Military walked the streets. The South Street Seaport Fire House was draped in black. My building, covered in pictures and ash, had bomb sniffing dogs. The dogs were there for a few months after the attacks. There were pictures of those lost lovingly hung on buildings and anywhere they could possibly be attached. Signs beckoned to the searchers and rescue workers to come and rest for a little while, not many of them did, they were all at ground zero working to find survivors, recover their fallen, and put out the fires that still burned. You could tell which way the wind was blowing, or if a fire had been uncovered for weeks after the attacks by the smell outside my building. We would buy water and coffees for anyone in the Water Street Deli that we knew were working at Ground Zero. It was the least we could do. A dear friend that I worked with and I walked the streets of lower Manhattan during our break at about 2:20AM September 22, 2001. These are just a few snapshots frozen in time, frozen in history.


 |
Trinity Church |


My shifts at the time were Monday and Tuesday, 4PM to 12AM. then on the weekends, I did the midnight shift. It was a perfect shift for me since it meant that my son was always with myself, my husband, or our family. I would take the trains during the week, but on weekends I drove. Manhattan was closed to car traffic my first few weeks back to work, so I would take the Staten Island Ferry there and back. This was my view coming home after my return to work.


I will never forget the events of the day. September 11, 2001. I will never forget the weeks and months that followed. I will never forget all those whose names are so gently spoken each year. The people I knew personally, and those I had never met, but am so touched by their lives. I will always remember.
May God bless them, their families, and our great country.
Tuesday, September 7, 2010
Candle Tutorial
I am a candle lover. Back in 70's and 80's, even today, the perfect gift to me was a candle. I still have many of them because I hoarded them, never touching a match to the waxy wicks ever! There's a rainbow candle, unicorn, garden gnome, a few santas, many cats, and of course I had the usual peace signs and smiley faces that were everywhere in the 70's. These days I burn my candles. I savor the lovely scents that burn quietly as I go about my daily business. I also love to create candles with stamps. About 6 months ago, I saw a great tutorial on Whiff of Joy Inspirations & Tutorial Blog and decided to give it a try. Since then, I have made many candles, given them as gifts, and had one gift set published in a small magazine. This is a version of that set. Enjoy!


Stamp your image on the glossy side of the tissue paper. I used one of my favorite stamps, “Cupcake” by Belles ‘n Whistles, designed by Elisabeth Bell. I prefer to have a magazine under the tissue paper when I stamp. I use a piece of tissue paper big enough to tuck under the magazine for extra stability. To prevent the ink from bleeding, I use a spare piece of cardstock under the tissue paper, as well. I also love my magnetic cutting mat by We R Memory Keepers, having the magnets to hold the tissue paper in place as I color helps to prevent tearing and wrinkling.
I used Tsukineko Brilliance ink in Graphite Black so that I could color with the copic markers, and prevent bleeding. The candle I used is 2.8 x 6 inches, so I stamped the image twice.

When coloring on the tissue paper, I find that the usual style of blending with copics can cause the paper to tear, so I choose colors for my images that will blend easily, and I try to not to blend too much. Unfortunately, the wonderful shading that copics are known for on paper is much more difficult to achieve on tissue. I also use a very light touch when adding the color to the tissue paper. I love my magnetic cutting mat by We R Memory Keepers, having the magnets to hold the tissue paper in place as I color helps to prevent tearing and wrinkling.
Here a couple of pictures of the image in progress. You can see the color bleeding through the tissue paper; it looks very dark in the first picture. I lifted the paper in the second picture so you can get an idea of how light the colors really are.


 I wrap the candle as tight as I can, and use an extra long piece of wax paper so that I can make a “handle” to hold. The pictures above show the progression of the stamp as you heat the candle. When the image starts to brighter; it is melting into the candle. Keep the heating tool moving at all times. If you stay in one area too long, drip marks will develop. Heating times vary on the candle. I use candles from Michael's as opposed to the Dollar Store candles; I think they melt cleaner and more even. I also use Reynolds wax paper instead of Dollar Store wax paper for the same reason. You want the image blend into the candle as you are heating it. Once the edges are no longer visible, I quickly run the heating tool over the candle one more time, and start to remove the wax paper. I gently peel the wax paper off. If there are still seams, I will take a new piece of wax paper and add some more heat to the candle. After the paper is removed, I run the heating tool once more over the image, usually around the edges. It’s just a quick shot of heat, no more than a few seconds.


 I took clear skittles, put them in a small zip lock bag, and add several drops of Ranger Alcohol Ink to make embellishments for the ribbon.
I also colored a couple of Prima jewels with the Alcohol Ink. Instead of putting them in the zip lock bag, I applied the ink directly on the jewel where I wanted change the color. 

Colleen
Birthday Candle
By Colleen McCauley

Materials Needed
Candle
Stamp
Ink
Tissue Paper
Wax Paper
Copic Markers
Clear or Colored Skittles
Alcohol Ink
Flowers
Ribbons
Rhinestone Embellishments
Heating/Embossing Tool
Adhesive

Stamp your image on the glossy side of the tissue paper. I used one of my favorite stamps, “Cupcake” by Belles ‘n Whistles, designed by Elisabeth Bell. I prefer to have a magazine under the tissue paper when I stamp. I use a piece of tissue paper big enough to tuck under the magazine for extra stability. To prevent the ink from bleeding, I use a spare piece of cardstock under the tissue paper, as well. I also love my magnetic cutting mat by We R Memory Keepers, having the magnets to hold the tissue paper in place as I color helps to prevent tearing and wrinkling.
I used Tsukineko Brilliance ink in Graphite Black so that I could color with the copic markers, and prevent bleeding. The candle I used is 2.8 x 6 inches, so I stamped the image twice.

When coloring on the tissue paper, I find that the usual style of blending with copics can cause the paper to tear, so I choose colors for my images that will blend easily, and I try to not to blend too much. Unfortunately, the wonderful shading that copics are known for on paper is much more difficult to achieve on tissue. I also use a very light touch when adding the color to the tissue paper. I love my magnetic cutting mat by We R Memory Keepers, having the magnets to hold the tissue paper in place as I color helps to prevent tearing and wrinkling.
Here is a list of the colors I used on this candle:
Skin: E00, E01
Cheeks, Lips: R20
Hair: YR31, Y21 and just a touch of #35 for highlights
Bonnet: YG23, Yg06, and G14 to darken the edges
Bow: YG23, YG06, and G14 for shadows
Sleeves and collar: Yg23, the stripes are G14 and E99
Apron: YR02, YR65 for shadows
Pants: YG23 base, YG06 Highlights, G24 for darker areas
Cupcake: RV02 icing, R29 Cherries, E13 Holder
Kitty: E99 body, E31 Chest, Lightly add R29 for nose & inner ear
Flowers on sleeves and bonnet: RV02, B02, RV09, RV17, FY1, and FYR1
Leaves: G07
Here a couple of pictures of the image in progress. You can see the color bleeding through the tissue paper; it looks very dark in the first picture. I lifted the paper in the second picture so you can get an idea of how light the colors really are.


When your images are finished, cut them out. Don’t worry about cutting too close to the image; it will melt into the candle when you are heating it. I leave around an eighth of an inch or so. I place the image with the glossy side up on the candle. It’s good to mention that if you are planning on stamping any type of sentiments, stamp them on the glossy side so that when you place it on the candle it isn’t reversed! Generally, I don’t use anything to hold the image in place, the tissue paper has some static charge to it, and it will hold if you smooth it down a couple of times. Then I wrap a piece of wax paper around the candle, heat up the embossing tool and have some fun!


  |

I used a Prima “Say It In Crystals” to add the swirls in between the images. I cut the swirls to the size and shape that I liked. They are self adhering, but I add a tiny dot of Scotch Quick Dry adhesive in a few spots. Sometimes the wax makes it hard to hold the embellishments on. I did the same thing with the Basic Grey Hearts. I also used Stickles to add a little sparkle to the image. I attached the ribbon with scor tape and the skittles with glue dots.
I took a plain white bag, used the same cupcake image and created a gift bag to match. I decorated the bag with DCWV Songbird Paper. I also created a matching card to complete the Birthday set.
I hope you try this technique out. It's easy as pie, and a wonderful gift from the heart! Here's the complete set.
Thanks for stopping by!
Happy Crafting!Colleen
Subscribe to:
Posts (Atom)